by bbrah » July 22nd, 2009, 7:37 pm
I'm sorry that it's taken me so long to reply to this thread. I was on vacation and just got back.
First off, I use good ol' vaseline (actually generic-brand petroleum jelly) to condition all of my gloves there was a huge discussion about conditioners a while back, I'm sure you can find the thread. Nokona recommends vaseline to condition their gloves, and I've used it for years to (re)condition everything leather, it was a trick I learned from my grandpa to recondition combat boots.
As far as the confidence to cut apart and re-sew a glove, A baseball glove is really two gloves with a layer of padding between them. Even so, I suggest starting with a throw-away glove that you won't be upset if you ruin. Check the thrift stores and yard sales for a cheap old glove. If you screw up, that's OK, you'll have materials to make repairs on other gloves!
Have your digital camera ready and take lots of pictures along the way.
Remove the laces first.
Pull the liner out next.
Then remove the padding.
If you need to make repairs to the outer glove, you'll probably have to turn it inside-out.
I use a regular sewing awl with either black or brown waxed polyester thread.
I also have on hand a large sewing needle and a pair of needle-nose pliers.
I use a single-edge razor blade to cut the stitching, but often with older gloves, the cotton stitching is rotten and will fall apart when you pull it.
But be careful when ripping apart old stitching as often the leather is rotten and the thread will tear it.
If the padding is sewn to the liner, cut the threads but leave the remains on the padding, so you'll know where to re-stitch.
Once you have the liner separated from the rest of the glove, carefully cut the individual pieces apart. The liner is usually four or five pieces. I like to label each side of each piece to keep track of which is the inner surface and outer surface and how they fit together.
After you have separated them, thoroughly wet each one. The point is not to damage it, but rather soften it so that you can lay it flat to dry. You will use these as patterns for the new pieces.
Once the liner pieces have dried, you can lay them on another piece of leather and trace them with a sharpie. This is where it is important to know which side is which. Typically on a liner, the smooth side touches the hand and the suede side touches the inside of the glove.
Cut out the pieces with a sharp pair of scissors and using the old liner as a reference, mark where the pieces are stitched together. I like to mark the stitch lines on the suede-side with a sharpie. Liners are not completely stitched, often the tips of the fingers and sometimes the heels or outside edges are not sewn.
If you've done a good job tracing and cutting, you shouldn't have problems seeing how the new pieces fit together. Sometimes however, parts of the old liner may be totally rotted and/or missing, so just use your best judgment as to where the edges and stitching should be.
Next stitch the new liner pieces together. For liners, I usually use a whip stitch or a lock stitch. Don't worry if the stitching is uneven or if the spacing is irregular, the thread doesn't bear much weight and is really there just to keep the pieces aligned. Also, you won't be able to see the stitching once the glove is put back together.
If the padding is rotten, replace it, otherwise you may just want to add a little piece here or there. I'm sure that you can buy the felt somewhere, but I usually cannibalize a $3 thrift store glove for padding (even a vinyl glove will yield decent padding).
If the outer glove is rotten or damaged, it's a bit more work, but basically similar to repairing the liner. It's best to not replace pieces if you can avoid it, so sometimes you can just sew another piece to the inside as support. If I have to replace a piece of the outer glove, I usually use leather from another glove, that way it matches better.
I also replace the faux shearling with the real deal. This adds strength because it's actually a piece of leather.
Follow the same replication instructions as for the liner, but you will have to stitch more carefully. It's easier to stitch if you make pilot holes first. I use my awl and a block of soft wood and punch the line of holes in the leather, then it's just a matter of lacing in the thread.
Often the glove will have gussets between parts of the fingers. If these are rotted or damaged, you can use a rawhide lace but you will need to make pilot holes in it.
Edge taping is probably the most bothersome part of the repair. Even quality gloves use vinyl edging, and this gets brittle and cracked with time. I usually make new edge taping from thin leather cut in 1 1/4 inch strips. I coat the suede side with contact cement fold the both edges inward, leaving about 1/8 inch space between. This lets the edge tape wrap around the thick leather of the glove.
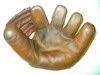
Note how the old tape was attached to the glove and attach the new in the same manner. You may have to make pilot holes in it. In some cases, as with this RGB 36, you can forgo some of the edge taping and it will still look OK. Some older gloves do not have tape at all.
Grommets are another matter. If you have to replace them, and you will if you replace the liner, try to get grommets the same size. You'll need grommets, a punch, and a grommet setter. Color isn't usually an issue. You can find "antique brass" or "bright zinc" at Tandy Leather, and if you must, you can paint them before you install them or if you have a steady hand afterward. Model paint works well, as does automotive touch-up paint.
After the liner is repaired and stitched to the padding, the grommets are punched and set, and the edge taping is installed, put everything back together. Use your digital photos for reference.
Sometimes it's a real bitch to get the finger padding back into the fingers. I just use a long pair of needle-nose pliers, but a pair of forceps or similar would work. Massage the padding in the fingers to make it lay flat. If you made additions to the padding, you can put a stitch or two to hold the new pieces in, or even a small piece of double-sided tape. Once the glove is assembled and laced, the padding will fit tightly.
Re-lace the glove.
I should probably buy laces in bulk, but I just buy them from the sporting good store. I've used Rawlings and Louisville laces with equal success. It's better to have too much lace than not enough, so I usually buy three packs for each glove. This also insures that the laces will match once they're installed.
For thinner laces (as opposed to narrower), I either trim standard laces with a razor blade or look for thin laces among the packs on the store shelf. You shouldn't need narrower laces, but sometimes you might. In that case, you can use rawhide boot laces.
When I lace, I like to use a lacing needle that the lace screws into from the back. The lacers that thread from the front are OK, but they sometimes distort the holes and don't work quite as quickly.
When lacing, be sure to keep the smooth side out. This means twisting the lace as it passes through the glove, but it will wear and age better and won't darken as much.
As far as conditioning, I slather the glove in vaseline and leave it in a warm place until almost all has absorbed. Then I play with the glove. After all, that's why we collect them!
Well, that's pretty much it. If you have specific questions, PM me.
-BRAH
One more thing, if you're having trouble even taking apart an old glove, if it's a dried out piece of wood, you may want to recondition it BEFORE you repair it. Slather it with vaseline and leave it it a warm place. If that doesn't work, as a last resort you can wet the whole glove with water and take it apart while it's still damp. Once the pieces dry, you can condition and re-assemble them.
Good luck.